Eye Color Changer
Explore a different eye color in a portrait through AI image editing. Describe the iris color and ask to retain the pupil, reflections, and surrounding face. Start with a clear close portrait so the model can see the existing eye details. Sceneform generates a new image for review rather than applying a precise color adjustment to selected pixels.
Compare plans and credits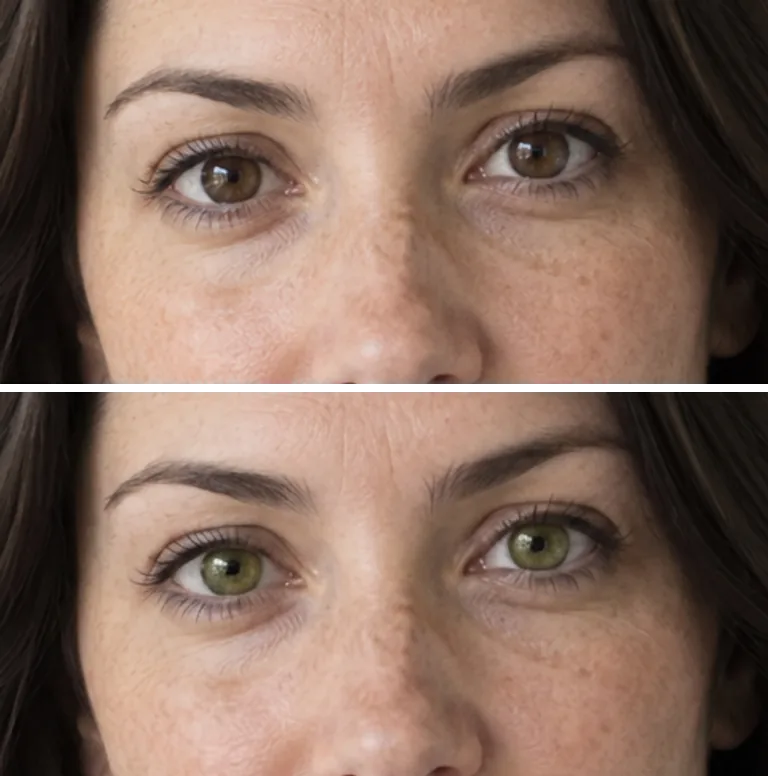
What you can create
Name the color and its intensity
Specify a muted brown, soft gray, deep green, or another clear color description. State whether you want a natural portrait or a fantasy character. Color and intensity matter separately, so describe both. A restrained request helps you compare the change without adding glowing effects or altering the rest of the eye.
Retain the eye's surrounding details
Ask the model to retain the pupils, eyelids, lashes, and reflected light. Mention both eyes when both appear in the photo. Reflections and shadows help the edited color fit the scene. Check those details because an image model can change the eye shape or gaze while interpreting your request.
Compare colors using the same photo
Keep your source image and most of the prompt consistent between attempts. Change only the color description when comparing directions. Review the face at full size and at your intended display size. Small eyes in a distant portrait may not show a subtle change clearly after the image shrinks.
From your idea to finished content
Choose a clear view of the eyes
Upload a portrait with visible irises and even lighting. Avoid heavy glare, dark glasses, or hair covering the eyes. Open it in Image Editor and check the credit cost shown next to the Edit button.
Describe the iris color
Request the desired color and specify which eye or both eyes. Ask to retain the original gaze and reflected light. Describe fantasy effects separately if you want them. Keep the initial edit focused on eye color to make comparison easier.
Inspect the whole portrait
Check both eyes for consistent color and believable reflections. Compare the pupil shapes, eyelids, and gaze with the source. Reject versions that change facial details you wanted to keep. Refine the color description when the result appears too bright or too dark.
Prompts to start with
Use these briefs as a starting point. Replace the details with your own product, audience, and style.
A restrained green color concept
Change both irises to a muted olive green. Retain the original pupil size, gaze, and reflected light. Keep the eyelids, eyelashes, skin, and background unchanged. Avoid glowing colors or exaggerated contrast.
A fantasy character portrait
Give this fictional character pale violet irises with darker outer edges. Keep the pupils dark and preserve the existing highlights. Retain the face shape and camera angle. Use a soft color effect without light spilling onto the skin.
Frequently asked questions
Explore related tools
Create your next project
Start with a clear brief. Review the result. Make it yours.