Speech Bubble Generator
Add a visual line of dialogue to an existing photo or illustration. Describe the bubble's shape, location, and exact words in Image Editor. Sceneform generates an edited image with the bubble inside it. The result is image artwork, so the bubble and lettering do not become separate editable objects.
Compare plans and credits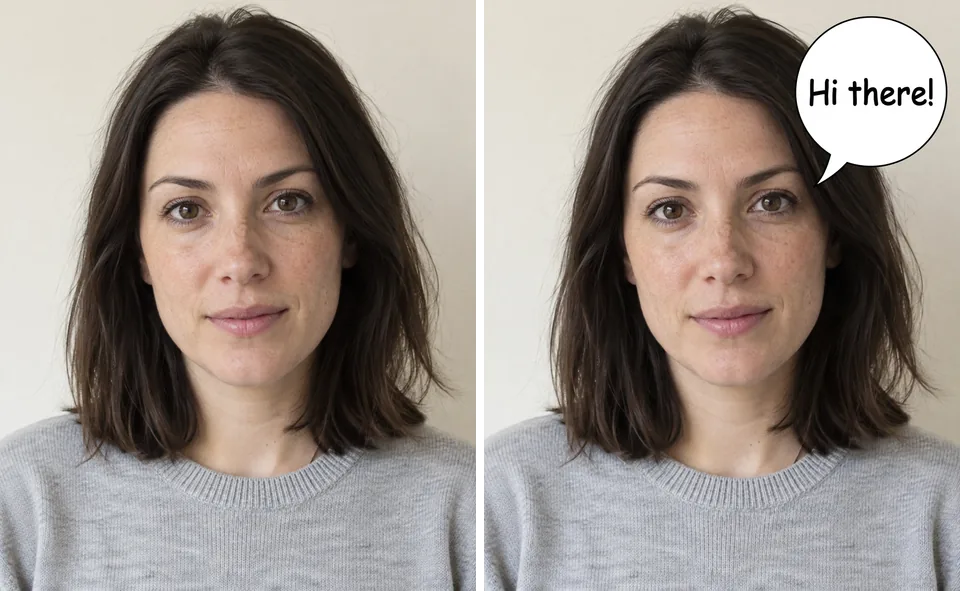
What you can create
Put the bubble where readers expect it
Describe a position relative to the speaker, such as above the left shoulder. Name the direction of the bubble's tail. Leave room around faces and important objects so the addition does not hide the scene. For several speakers, start with one bubble and check that its tail identifies the correct person.
Match the bubble to the scene
Request a rounded outline for ordinary dialogue, a cloud shape for a thought, or a jagged outline for emphasis. Describe the fill, border, and lettering together. Keep strong contrast between letters and their background. A simple shape usually leaves more space for words than a heavily decorated bubble.
Keep the wording short and readable
Place your requested words in quotation marks and use a short line. Check spelling, punctuation, and letter spacing after generation. Image models can misspell words or add marks even when your prompt is clear. Request an empty bubble if you plan to finish the lettering in another design tool.
From your idea to finished content
Choose a photo or illustration
Upload an image with space near the intended speaker. Open it in Image Editor. Decide whether the scene needs spoken dialogue or a thought bubble. This choice helps you describe the shape and tail clearly.
Write the bubble instructions
Specify the position, outline, fill, and exact text. Ask the model to retain the source image's composition. Keep the phrase short enough to read at the final display size. Use one speaker per request when the scene feels crowded.
Check the finished lettering
Read every character and inspect the tail direction. View the full image at a smaller size to check readability. Revise the prompt if the bubble covers the subject or the wording changes. Save the image after the text and placement match your intent.
Prompts to start with
Use these briefs as a starting point. Replace the details with your own product, audience, and style.
A short comic reply
Add one white speech bubble above the character on the left. Point its tail toward that character. Use a thin black outline and the exact words 'Your turn!'. Keep the face and surrounding scene visible.
A quiet thought
Add a small cloud-shaped thought bubble in the empty upper-right area. Connect it to the subject with three small circles. Leave its interior blank for later lettering. Retain the original illustration's colors and composition.
Frequently asked questions
Explore related tools
Create your next project
Start with a clear brief. Review the result. Make it yours.